
Lesson 23 | Using Inquiry Commands
This lesson describes how to use the Measuregeom command and other inquiry commands to obtain geometric information on objects in the drawing.
As you create objects, the defining points and object types are stored in the drawing database. You can use the commands on the Inquiry toolbar to retrieve this information or to obtain distances, angles, areas, object types, and other important data for objects.
Objectives
After completing this lesson, you will be able to:
- Describe measuring and explain why the data is useful.
- Describe how to use measure tools including distance, radius, angle, area, and volume.
- Obtain information about objects, such as type, location, dimensions and properties.
About Measuring
You can calculate the distance, radius, angle, area, and volume of selected objects or a sequence of points by measuring.
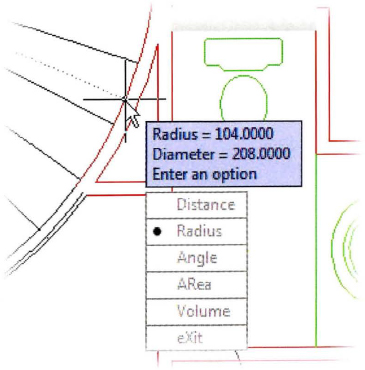
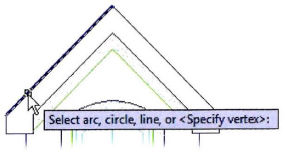
Measuring is especially useful when collecting data for building and manufacturing. In the following illustration, Radius is used to obtain the brick arch radius and is mandatory for accurate construction.
Definition of Measuring
Measuring is used to ascertain the extent, dimensions, and capacity of certain objects. Measuring enables you to obtain geometric information from such things as arches, room areas, polylines, and 3D solids.
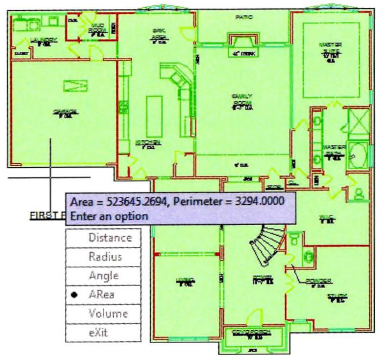
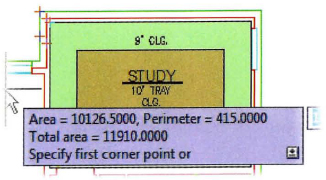
Example of Area Measurement
The following illustration shows the results of using the Area tool to obtain the total square footage of a floor plan.
Note: The Area tool also provides perimeter data.
Using Measure Tools
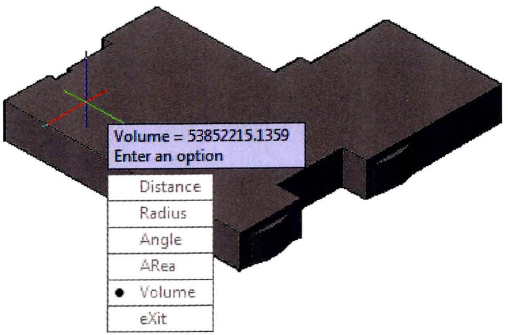
Measure tools are used to pull specific data from objects. They provide a quick and effective way to collect useful information such as the total amount of concrete needed for a foundation or the precise volume of an excavation area. This information is frequently necessary to communicate pertinent measurements to outside sources or to ensure that a design meets criteria. The process for obtaining such information is combined into a single command in which different measurement options are chosen.
The following illustration shows the Volume option that is used to acquire data from a 3D object.
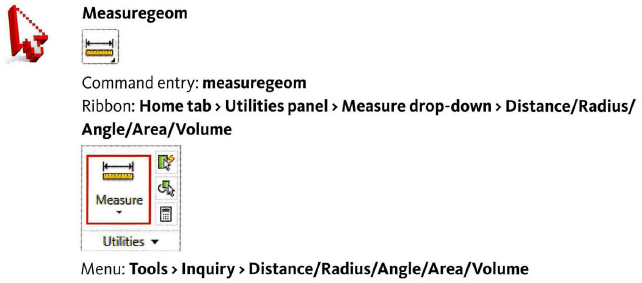
Command Access
Measure Command Options
The following illustrates the different measuring tools and what they are used for.
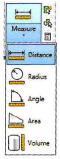
| Option | Description |
| Distance | Measures the distance between two specified points or totals the distance between multiple points. |
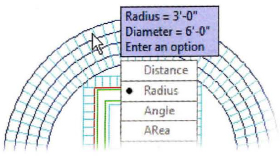
| Radius | Measures the radius and diameter of a specified arc or circle. |
| Angle | Measures the angle of a specified arc, circle, line, or vertex. |
| Area | Measures the area and perimeter of an object or defined area. There are also options to keep a running total as you define areas or to subtract specified regions from total calculated area. |
| Volume | Measures the volume of an object or a defined area. There are also options to keep a running total as you define volume or to subtract specified regions from total calculated volume. |
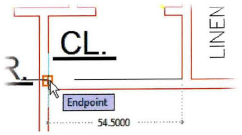
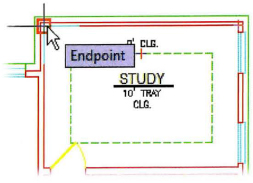
For the same reason you use object snaps to create geometry, using object snaps to select points for Inquiry commands is critical. If you estimate the point selection, the value returned will not be accurate.
![]()
Measure Distance
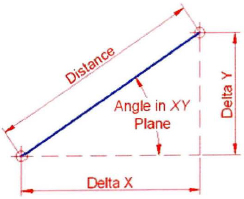
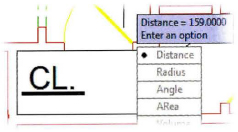
The Distance option of the Measuregeom command prompts you to select two points on the drawing and then returns information about the distance between them, their angles in and from the XY plane, and their delta values (distance traveled along each axis) in both 2D and 3D planes. The information is presented to you on the command line in the format shown below. You can also see it in the Text Window by pressing F2.
Distance = 157.1924, Angle in XY Plane = 34, Angle from XY Plane = oDelta X = 130.3938, Delta Y = 87.7889, Delta Z = 0.0000
The following image illustrates the values returned with the Distance command.
Process: Measuring Distance
The following steps give an overview for acquiring the distance between two points using the Distance option of the Measuregeom command.
- On the ribbon, click Home tab > Utilities panel > Measure drop-down > Distance.
- Select first point.
- Enter M for Multiple Points and select second point.
- Continue to select points until you arrive at starting point.
- Right-click and select Enter to close command.
- Note running total of the distance acquired.
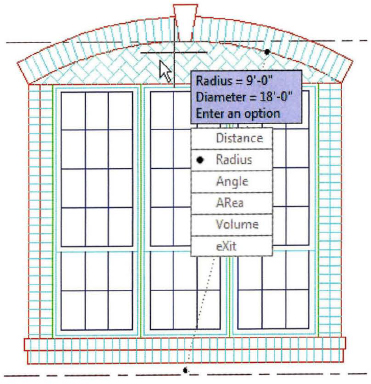
Process: Measuring Radius
The following steps give an overview for acquiring the radius using the Radius option of the Measuregeom command.
- On the ribbon, click Home tab > Utilities panel > Measure drop-down > Radius.
- Select arc.
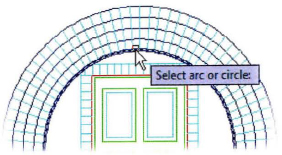
- Note radius and diameter of arc.
Procedure: Measuring an Angle
The following steps give an overview for acquiring the angle of two lines using the Angle option of the Measuregeom command.
- On the ribbon, click Home tab > Utilities panel > Measure drop-down > Angle.
- Select first line.
- Select second line.
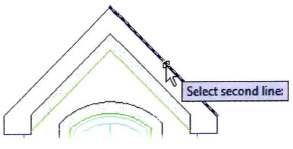
- Observe resulting angle.

Process: Measuring Area
The following steps give an overview for acquiring the area of a space using the Area option of the Measuregeom command.
- On the ribbon, click Home tab > Utilities panel > Measure drop-down > Area.
- Enter Add at the command prompt and select the first point.
- Continue selecting points in a sequence that defines the perimeter of the area. Press Enter.

- Enter Subtract at the command prompt and select the first point of the area to subtract.
- Continue selecting points until you arrive back at the starting point. Press ENTER and note the new total area.
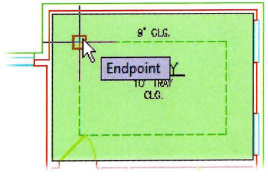
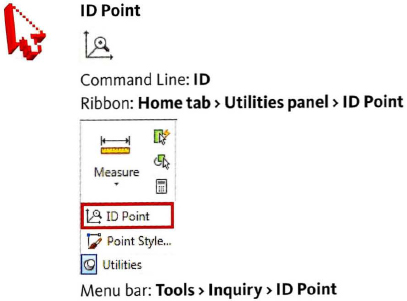
ID Point
With the ID Point command, you can retrieve the precise location of any point in the drawing. When you start the ID Point command, you are prompted to specify a point. This can be a point in the drawing or a point on an object. The ID Point command returns the coordinate of the point you select, as shown below.
X = 624.3266 Y = 208.1684 Z = 0.0000
As with all other Inquiry commands, the values are returned in the current units of the drawing.
Command Access
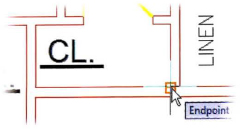
Selection Accuracy is Key
For the same reason you use object snaps to create geometry, using object snaps to select points for Inquiry commands is critical. If you estimate the point selection, the value returned will not be accurate.
![]()
Procedure: Identifying a Precise Location
The following steps give an overview of identifying a precise location in the drawing.
- Start the ID command.
- Use an object snap to accurately select a point in the drawing. The coordinate is displayed on the command line.
Note: F2 will display the entire AutoCAD Text Window.
Guidelines
Consider the following guidelines when using the Measure tools:
- When you measure an object, the position at which you select the object determines the measurement of the object.
- If you use multiple points, a running total of the distance based on existing line segments and the current rubber band line is calculated.
- The Measuregeom command cannot calculate the area of a self-intersecting object.
- With the Area tool you may turn on the Add or Subtract mode and either keep a running total of area as you define areas or subtract a specified area from the total area.
- With the Volume tool you may turn on the Add or Subtract mode and either keep a running total of volume as you define regions or subtract a specified region from the total volume.
- When using the Volume tool, you may select 3D solids or 2D objects. However, if you select a 2D object you must specify a height for that object.
- You can select polylines when using the Distance, Area, and Volume options.