

Save a Document as a Standard Print-Only PDF?
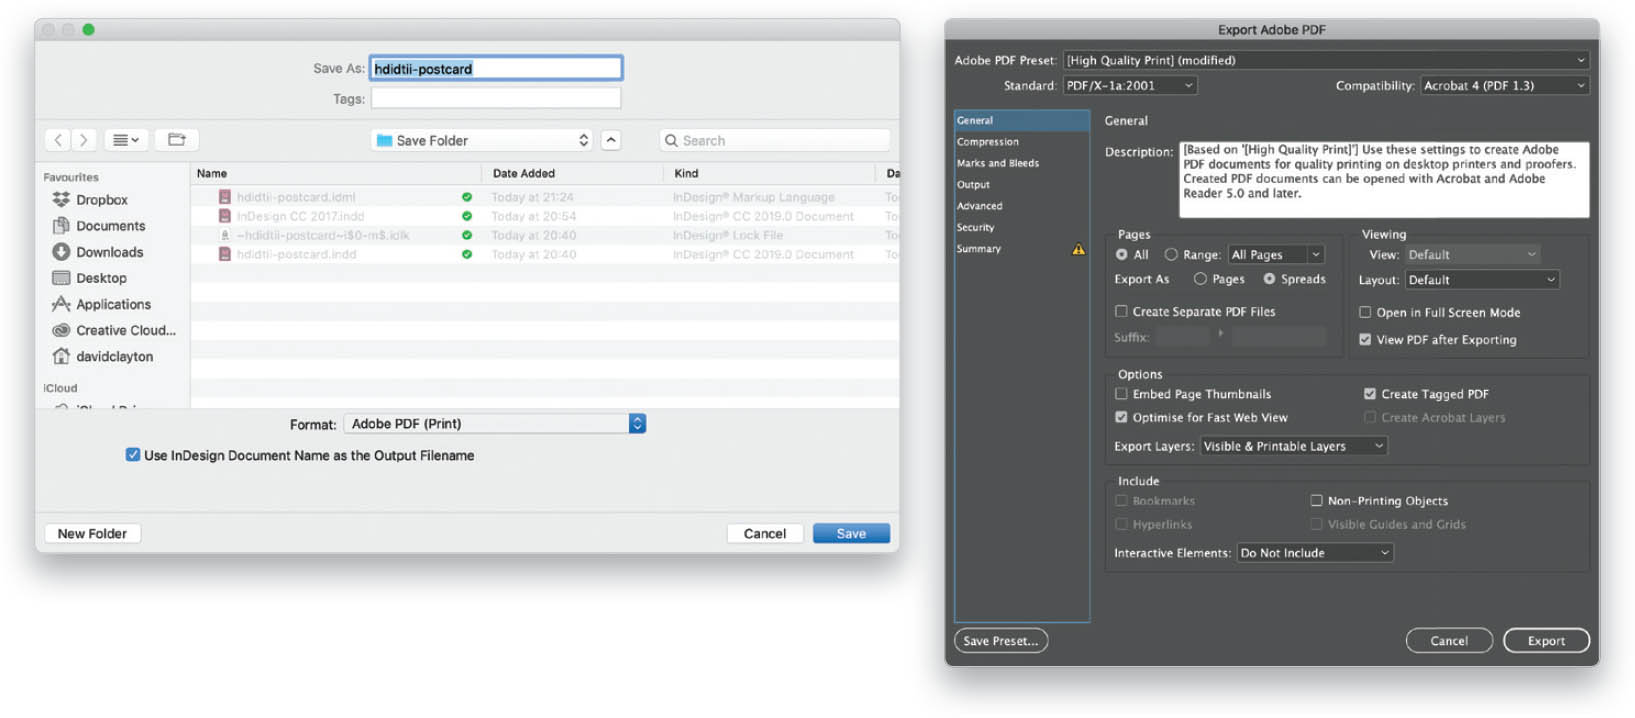
First, a quick caveat: the world of PDFs and prepress printing is huge and goes beyond the scope of this book. Here, I am going to show you how to save a file as a PDF with default settings. If you want to further pursue the world of PDFs, I suggest you find a good local printer and a comprehensive book on printing. Okay, let’s export our file to PDF. There are a couple of ways to do this, but we’ll use the default method. There are two options for this in the File menu: Export and Adobe PDF Presets. We’ll stick with the basic one—Export—to show you how to get to the PDF stage. Once you select Export, you’ll get a Save As dialog where you can name the file and choose where you want to export to (i.e., where to save the file). In the Format (PC: Save as Type) menu, select PDF Print, then click Save. This opens up the Export Adobe PDF dialog. This might scare you, but don’t panic! First, I always open the Adobe PDF Preset menu and choose High Quality Print. I want a high-quality PDF, and it’s much easier to send bigger files these days. Next, I go to the Standard menu and choose PDF/X-1a:2001 because it’s the best start to ensure the PDF has all the elements it needs. (Note: For PDF/X-1a, all fonts need to be embedded and all images need to be CMYK or spot colors.) The only other thing I do is put a check mark in the box next to View PDF after Exporting. We are going to cover a couple of other elements in this chapter, but we’ll leave them for now. Click Export and your document will be exported to PDF and saved in the location you chose, and a preview will open up in Acrobat.